How to handle the WPA dialogue
Send out a questionnaire
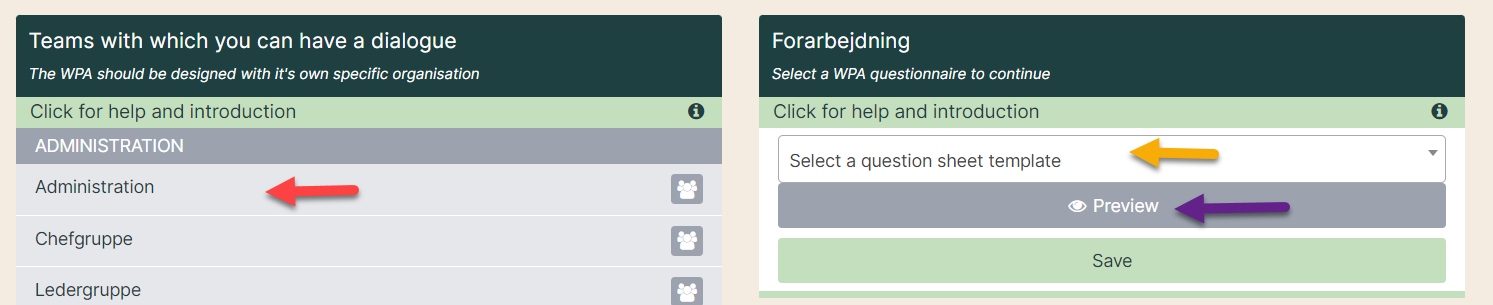
1. Go to theWPA tool. Click on the team you wish to send a questionnaire to (red arrow). A box will appear on the right where you can select your questionnaire (yellow arrow). If you want to see the questionnaire before sending it, you can click on 'Preview' (purple arrow). Once the questionnaire is selected, click on 'Save' to create the dialog.
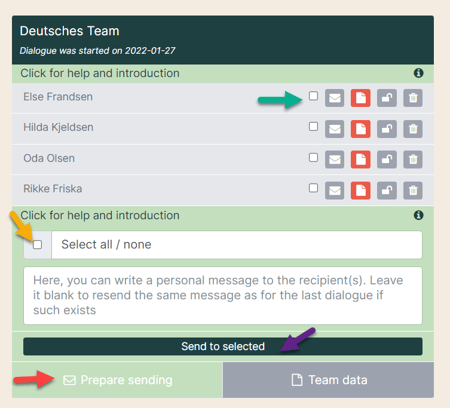
2. Click on the box 'Send options' (red arrow). When you click on it, it unfolds.
You can choose to send to all employees in the team (yellow arrow). It is also possible to send to individual employees. Then you just tick off the little box off next to their name instead (green arrow).
In the white text field you can write a personal message to the employee. This message will be included in the standard email.
When you have filled in everything, click 'Send to selected' (purple arrow).
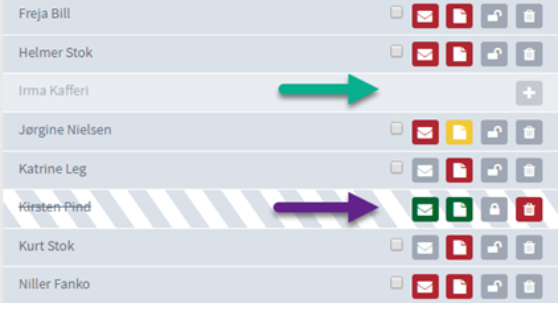
3. The envelope color shows the employees status:
- Yellow envelope: The form has been opened but not completed / sent
- Red envelope: The form is not open
- Gray envelope: No form has been sent out
- Green envelope: The form has been completed and sent to the manager
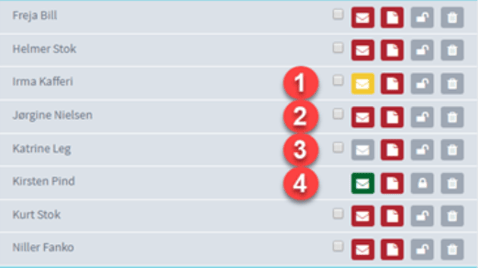
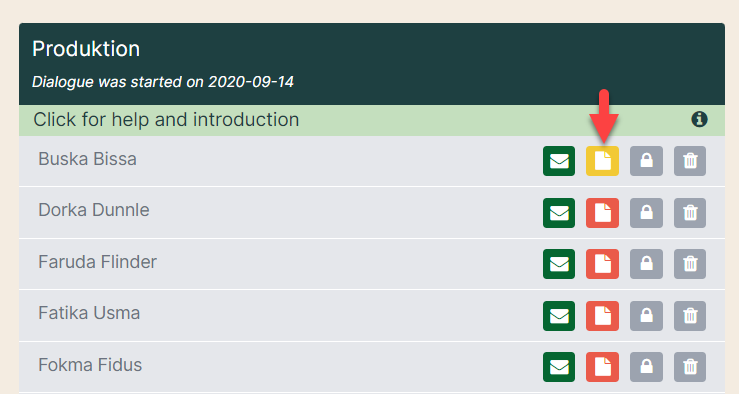
4. The color of the minutes shows the status of the leader.
- Yellow minutes: The minutes are open but not closed
- Red minutes: The minutes have not been opened yet
- Green minutes: The minutes are completed
The gray padlock (green arrow) shows whether the form has been handed in (locked) or not handed in (open). If the padlock is closed and the employee wants to correct his answer, the manager can unlock the form by clicking on the padlock. If you want to delete a dialog, click on the trash can (yellow arrow).
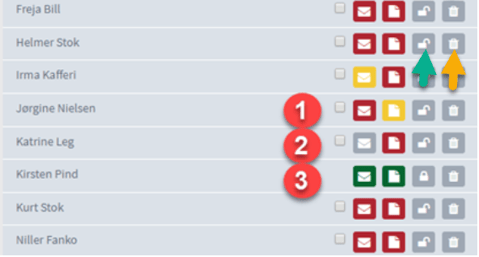
5. If you remove an employee who has not yet completed his / her schedule, he or she will receive a plus (green arrow). If the dialog is completed when the employee is deleted, the employee is crossed out (purple arrow). The completed form is still included in the statistics, even if the employee has been deleted.
Make minutes based on the answer
1. Click on the summary sheet you need.
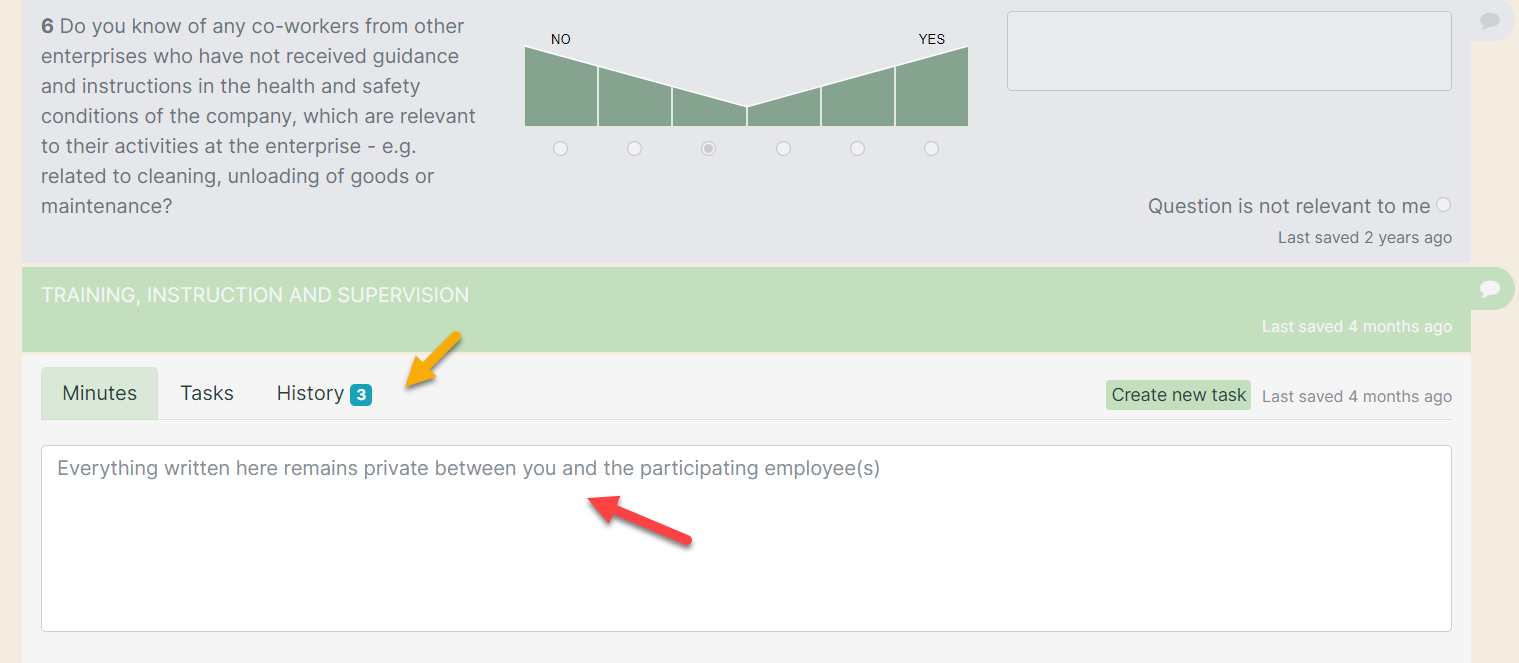
2. Here you can see your employee's score as well as any comments. Click on the speech bubble next to that question to write something in the minutes (red arrow).

3. Write your text in the white box (red arrow). The form is saved automatically - however, it is not visible to the employee until you click on 'Close and send the answars' at the bottom of the minute. If you have previously written a summary in the, you will find it under the tab 'History' (yellow arrow).
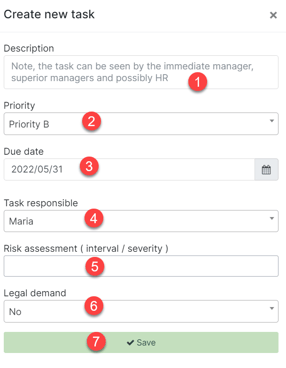
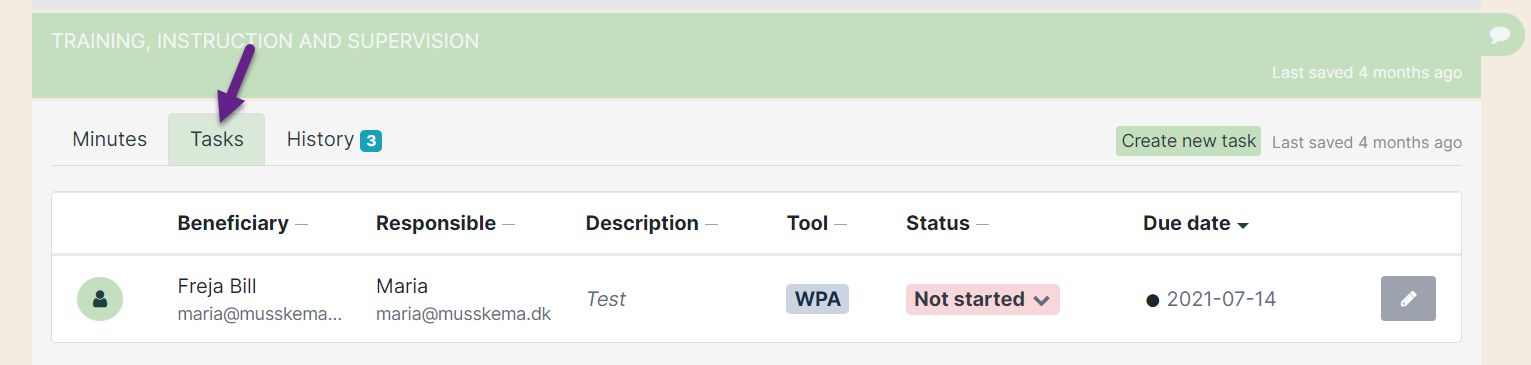
4. To create tasks, click on the 'Tasks' (red arrow). Fill out the blanks:
- Add your description of the task.
- Select a priority.
- Choose a deadline.
- Select a responsible.
- Make a risk assessment.
- Decide whether it is a legal requirement.
- Finish by clicking on 'Save'.
Previous tasks to this question can be found in the overview (purple arrow).
5. Once the form is completed, you can name it and send it to the employee by clicking on 'Close and send answars' at the bottom of the minute (red arrow).
