This is how to create your workplace assessment organisation
The WPA organisation can be created regardless of how the main organisation is build. You can create departments and teams with employees exactly as you need to by taking an employee from one team in the main organisation and placing them in your WPA team with an WPA questionnaire regarding that specific team. None of the re-organisation in the WPA organisation effects the main organisation e.g. EDP teams.
Where you place employees depends on, which questionnaire they must answer. Employees in the same team will receive the same questionnaire.
The WPA organisation
1. Go to the gear icon and click ”WPA organisation”.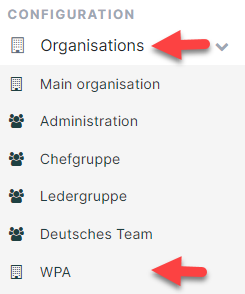
2. It is possible to copy the entire main organisation into the WPA organisation. When the WPA owner enters the WPA organisation for the first time, they have two options: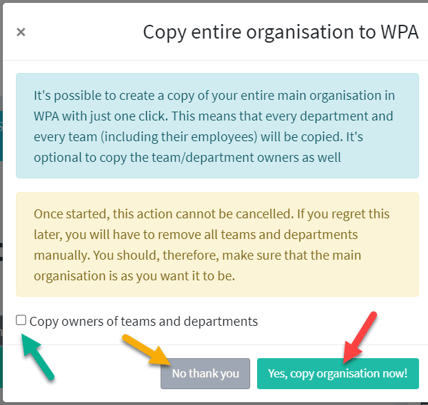
- Yellow arrow:You can choose “No thank you” and create the WPA organisation from scratch as you wish and not depending on the main organisation set up.
- Red arrow: By choosing ”Yes, copy organisation now”, you can copy the teams of the main organisation without the original team owners (managers).
- Green arrow: You can also choose to copy the main organisation along with the original team owners (managers). If you want this solution, first tick of by the green arrow and then click by the red arrow.
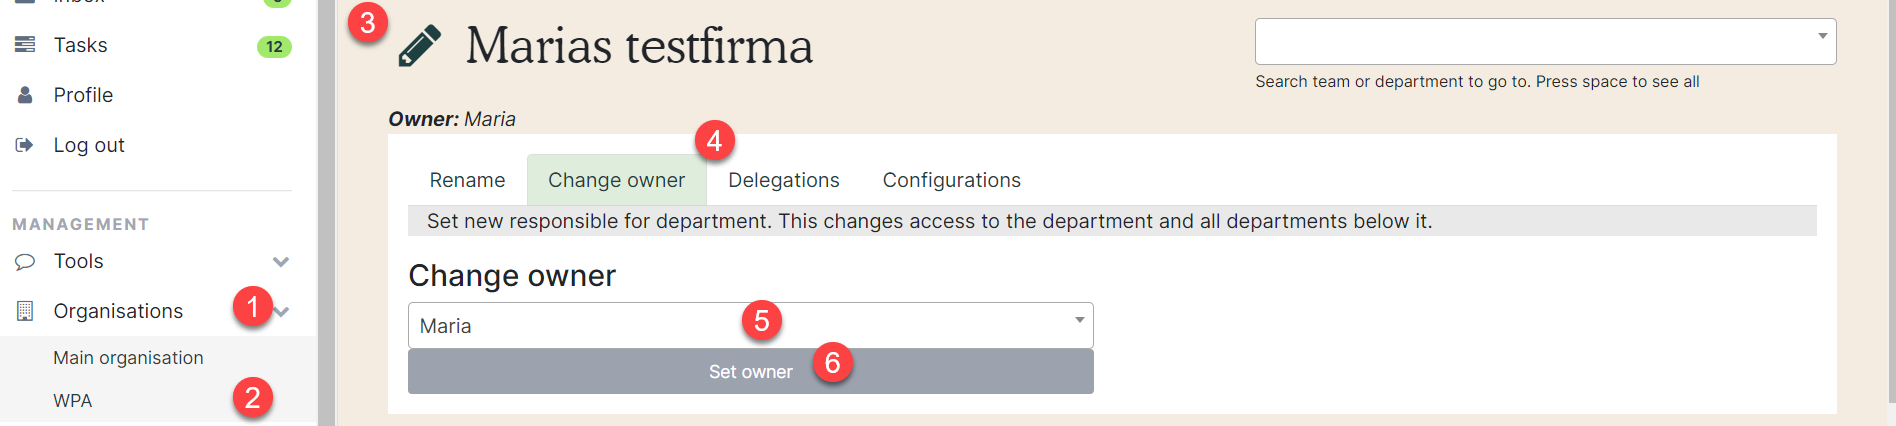
3. You can delegate the responsibility for the WPA to an employee. This is done within the WPA organisation.
Permissions to access teams and departments
1. If you did not choose to copy the entire main organisation, the employee with WPA ownership can set up the WPA organisation and place the employees in teams as well as set owners/managers of the WPA teams. You can also delegate permissions to access the different departments or teams. If you want, you can delegate different permissions to the health and safety representatives.
Open a department or team by clicking the team name (red arrow).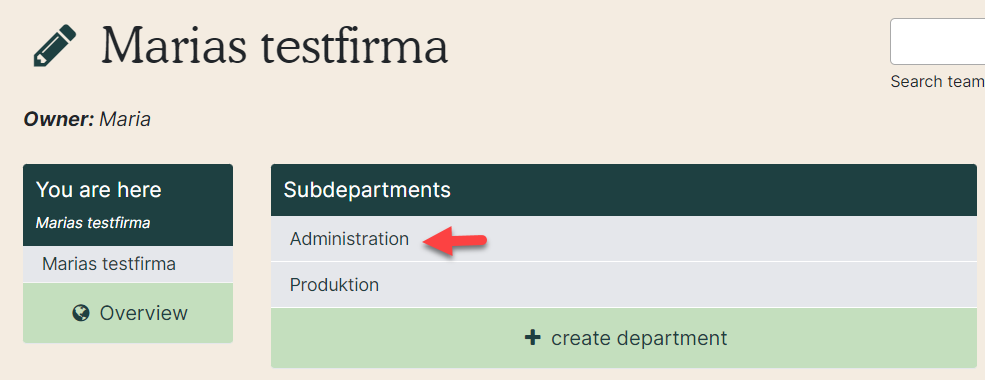
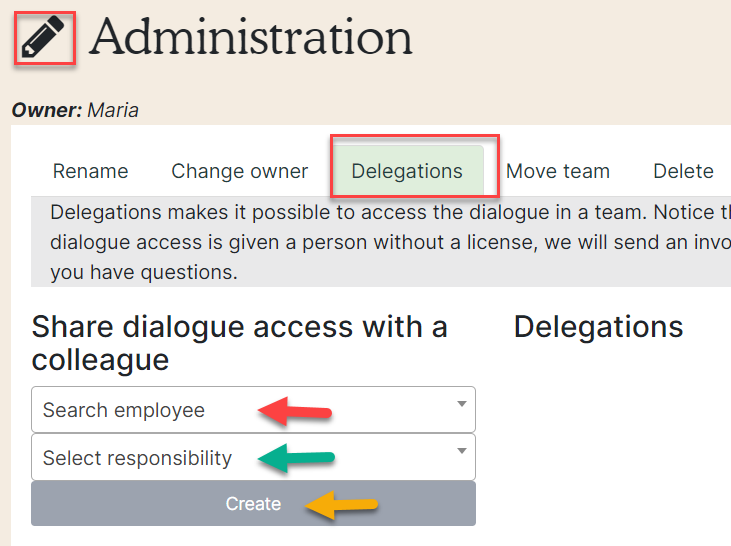
2. Click the pencil by the team name, so the box unfolds. Go to Delegations (red square). Search for the employee to delegate a permission to (red arrow) and the permission they need (green arrow). Finish by clicking “Create” (yellow arrow). Click the pencil again to fold it.
There are different types of delegations for departments and teams.
At development level you can delegate the following permissions:
- Access department, statistics, and configuration
- Access department and statistics
- Access department, statistics, and WPA tasks
At team level you can delegate the follwing permissions:
- Dialogue access workplace assessment
Add and remove employees
1. Click the team you want to add or remove employees from.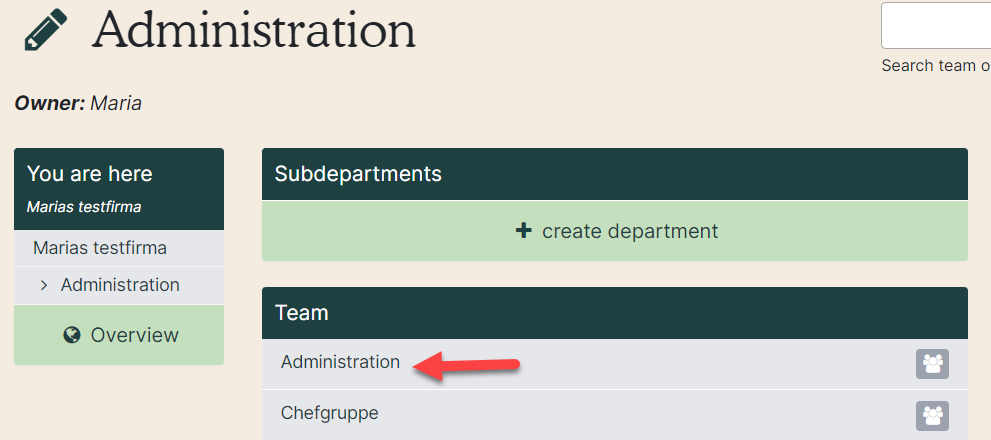
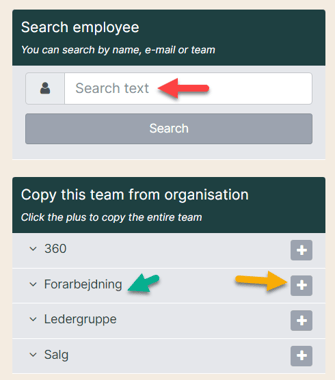
2. There are three options:
- Red arrow: Search for an employee and add them to the team by clicking on the plus icon.
- Yellow arrow: By clicking on the plus icon, you can transfer an entire team (from the main organisation). Then you can remove the employees who do not belong in the transferred team in the WPA organisation.
- Green arrow: By clicking the team name, it will unfold and show you which employees are not placed in a WPA team. By clicking the plus icon by their name, you can add them to the WPA team, you are in.
3. Remove an employee by clicking the minus icon by their name (red arrow) and clicking OK to the warning box.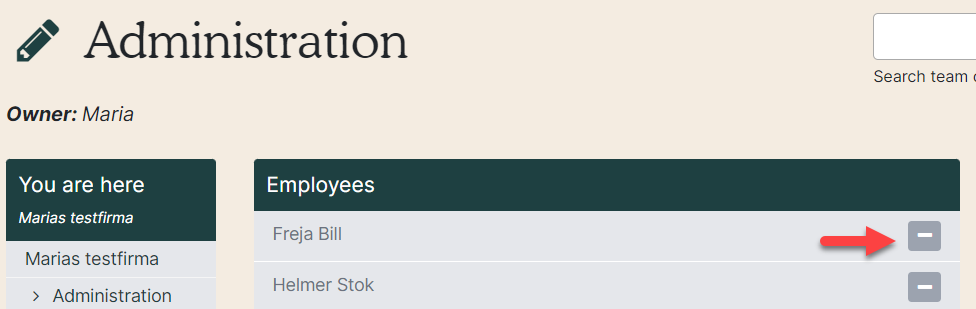
Start a dialogue round
When your WPA organisation is made, next step is the questionnaire. See how the general manual to questionnaires here.
See our standard WPA questionnaire here.
When the questionnaire is ready, next step is to start the workplace assessment. The owners of the teams can send the questionnaire out to their employees.
Go to the WPA tool.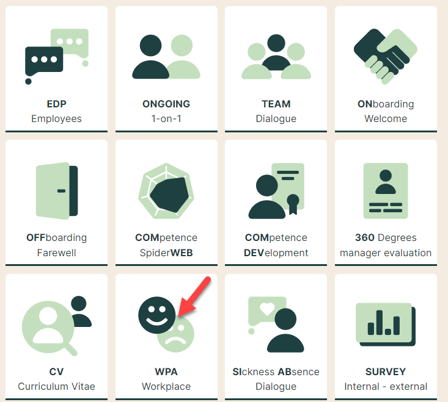
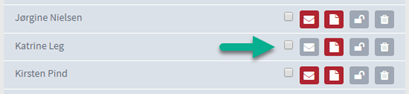
1. Click the name of the team you want to send the WPA questionnaire to (red arrow). On the right side a box will appear, where you need to select the questionnaire to send (yellow arrow). If you wish to see the questionnaire prior to it being send, click “Preview” (purple arrow). When you have selected the questionnaire, click “Save” to start up the WPA dialogue round (green arrow).

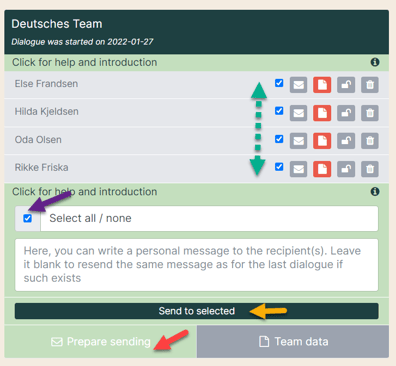
2. Next step is to prepare sending the WPA questionnaire to the employees. Click the box ”Prepare sending” (red arrow) and it will unfold and become green like in the photo below.
There are two ways to send the questionnaire to employees. One way is to send it to all in the team by ticking the box (purple arrow). Another way is to send the questionnaire to selected employees at a time by only ticking off their box (green arrow).
You can write a message for the employee(s) ticked off. This message will be shown in the e-mail they receive alongside the link to the questionnaire.
When everything is filled in, click ”Send to selected” (yellow arrow).
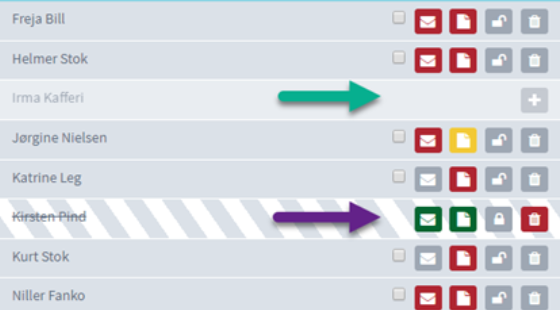
3. If an employee is added to the WPA-team after a dialogue round is started, you will se a plus icon by their grey name. Click the plus icon (purple arrow), if the grey employee is to be added to the WPA dialogue round.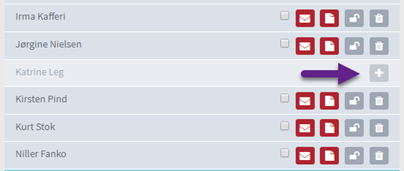
4. When an employee is added to the team this way, their envelope is grey. This is because no questionnaire is sent to them yet. If they are supposed to receive the questionnaire, tick the little box by their grey envelope (green arrow) and the e-mail is prepared (see the step further above).
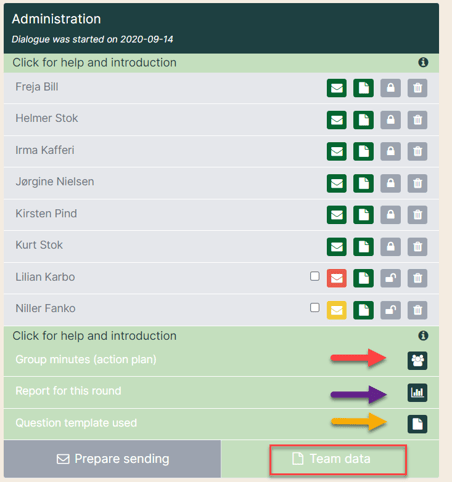
5. The envelope color shows how far the employee are with their questionnaires.
- Yellow envelope: Questionnaire has been opened, but not finished and sent.
- Red envelope: Questionnaire has not been opened.
- Grey envelope: No questionnaire is sent.
- Green envelope: The questionnaire is finished and sent to the person in charge of the workplace assessment.
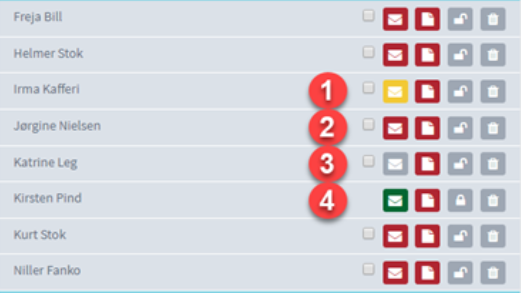
6. The color of the document icon shows the manager’s minute status.
- Yellow minute: The minute has been opened, but not finished.
- Red minute: The minute has not been opened.
- Green minute: The minute is finished.
The grey padlock (green arrow) shows whether the questionnaire is finished (locked padlock) or not finished (open padlock). If the padlock is locked, and the employee wishes to edit their answers, the manager can unlock the sent questionnaire by clicking the padlock. If you want to delete a dialogue, click the bin (yellow arrow).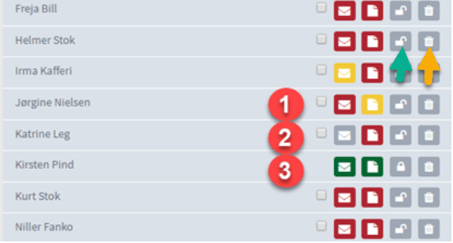
7. If you remove an employee who has yet to finish their questionnaire, you will see a plus by their grey name (green arrow). If the dialogue is finished when the employee is deleted, their name will be crossed out (purple arrow). The completed questionnaire of the deleted employee will still be represented in the statistics of the dialogue round.
Read more about the WPA dialogue.
Team data
1. When the employees are done answering the questionnaires and there might have been made individual minutes, you can click “Team data”. You now have the following options:- Red arrow: In the group minutes, you can make a collective minute for the overall themes in the WPA questionnaire as well as make action plans through tasks.
- Purple arrow: Get overall statistics for the dialogue round.
- Yellow arrow: See example of the questionnaire.