Learn how to onboard new employees
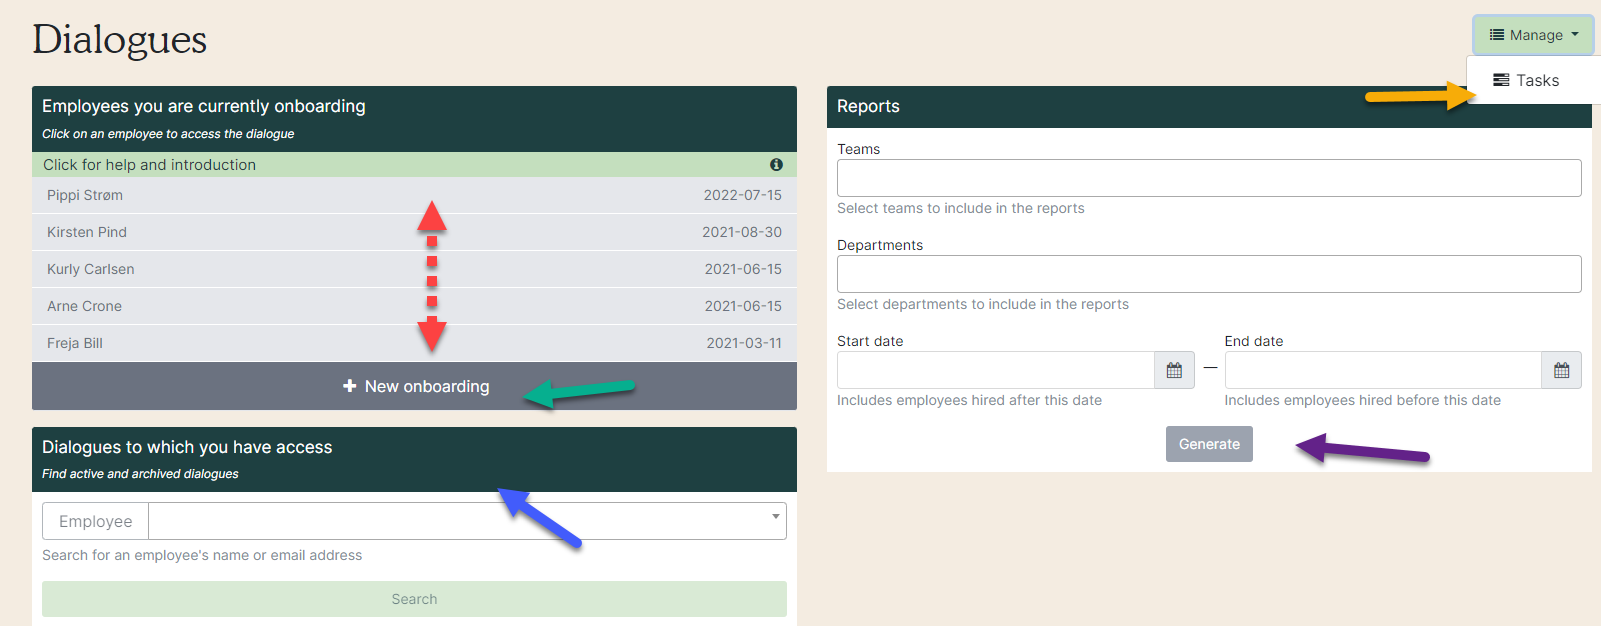
1. Go to the onboarding tool. You now have following options:
- Red dotted arrow: Overview of your active onboarding courses.
- Green arrow: Start a new course.
- Yellow arrow: Via the green 'Manage' button you can go directly to your tasks made in the onboarding.
- Purple arrow: Generate statistics for your onboarding courses.
- Blue arrow: Search for both active and archived dialogues you have access to.
Read more about delegations to onboarding in the manual “Setting up the onboarding”
Start an onboarding process
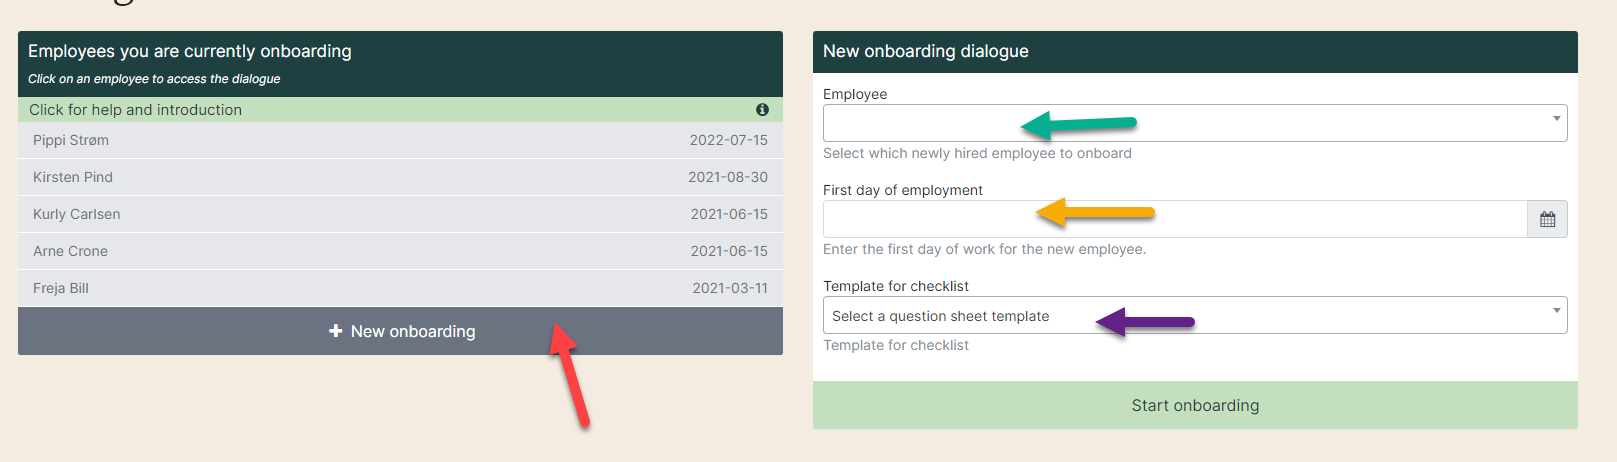
1. Click on 'New onboarding' (red arrow) and fill in the fields in the box to the right:
- Green arrow: Select an employee (has the employee not yet been created? Follow our instructions for creating an employee).
- Yellow arrow: Select the employee's first day of e,ployment.
- Purple arrow: Select a question sheet - the onboarding will always start with a checklist (read our general guide to question frames if necessary).
2. The checklist is created immediately. The remaining sheets appear and are sent for completion by the employee, as the dialogues are to be held (it depends on what you have chosen in the setup - possibly read our instructions for setting up onboarding).
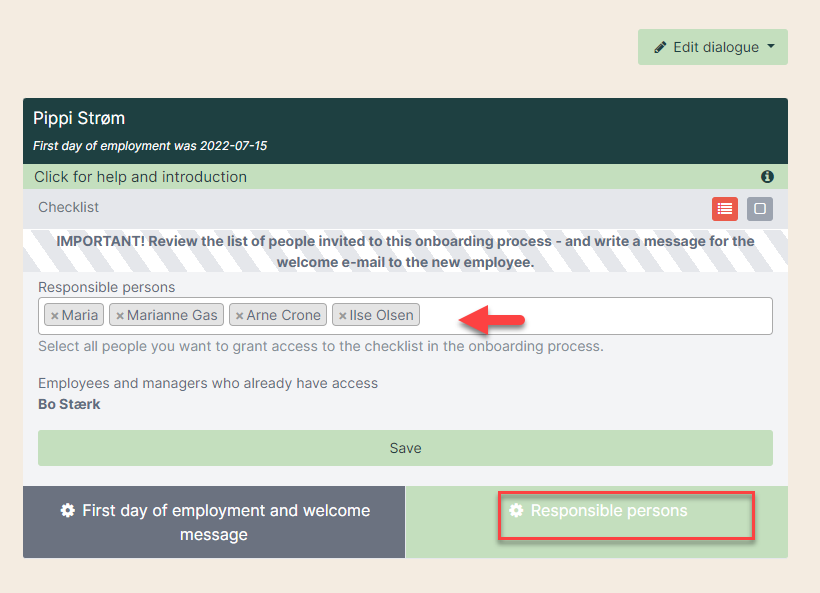
It is important that you review the list of people responsible for the onboarding (ie people who can access the checklist). Click on 'Responsible persons' so that the box unfolds. Remove people by clicking on the cross or search for new managers.
Employees responsible will after an hour receive an e-mail stating, that an onboarding dialogue is started. See the mail sent to the employees responsible for the check list.
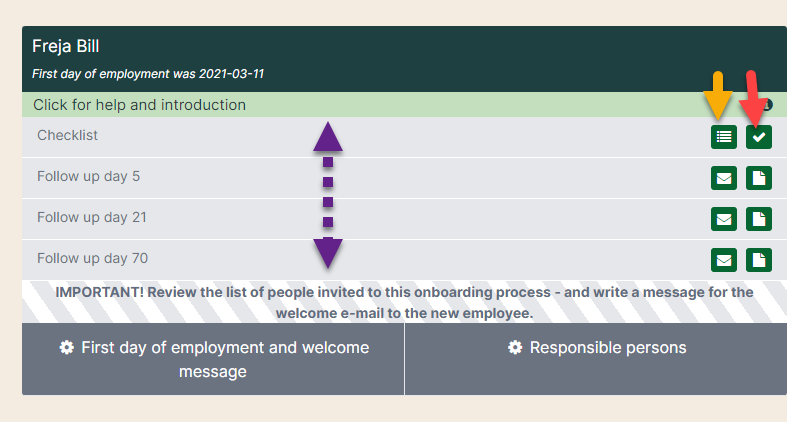
3. Edit first day of employment (red arrow) and write af welcome note (yellow arrow). The text will appear in the welcome mail, which will be send to the employee automatically on their first day of work.

4. The color of the the status of the dialog:
- Red = not opened
- Yellow = opened but not delivered
- Green = handed over
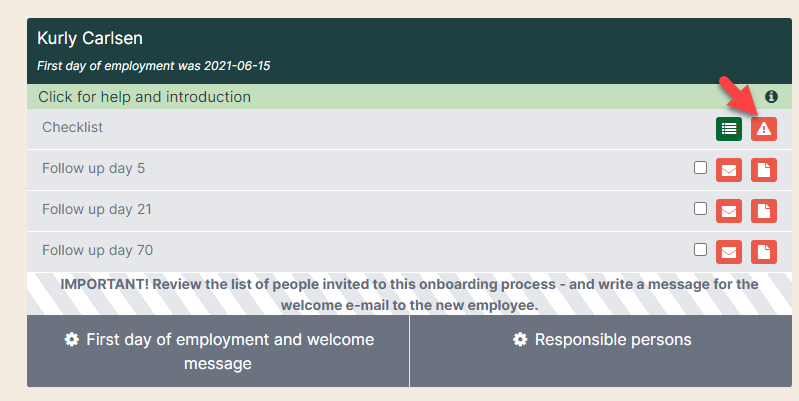
Warning sign (red arrow) = the symbol indicates that there is one or more mismatch between what the manager or the responsible professionals have said has been delivered to the onboarded, and then what the onboarded himself experiences. When you hold the mouse over the icon, it says, for example, that there are 3 expectations that do not match. Click - then you will see exactly what it is.
5. A mismatch is clearly marked.

Onboarding dialogues
1. The employee will receive a questionnaire on the days you have selected in the setup (see the guide 'Setting up the onboarding tool') (small dotted arrow).
The schedules first appear in the manager's overview of the days in question. In this case, the form 'Follow-up day 5' does not appear until day 5 after the date of employment. When the employee fills out and hands in the form, the envelope turns green (yellow arrow). The manager can then open the minutes and see the employee's answer (red arrow). We recommend that you have a dialogue with the employee based on the answer.
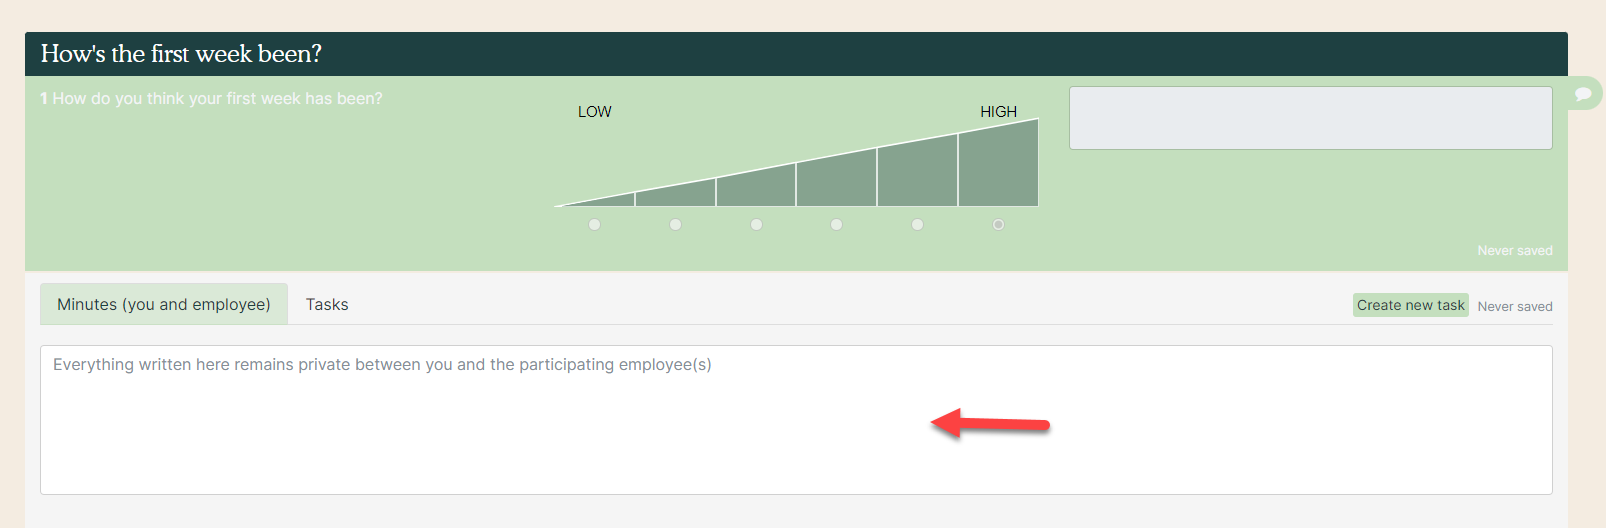
2. Open a question by clicking on the speech bubble.

3. You can write the minutes in the white box (red arrow). The minutes are automatically saved, but the answers are only sent to the employee when the manager clicks on close and send at the bottom of the form.
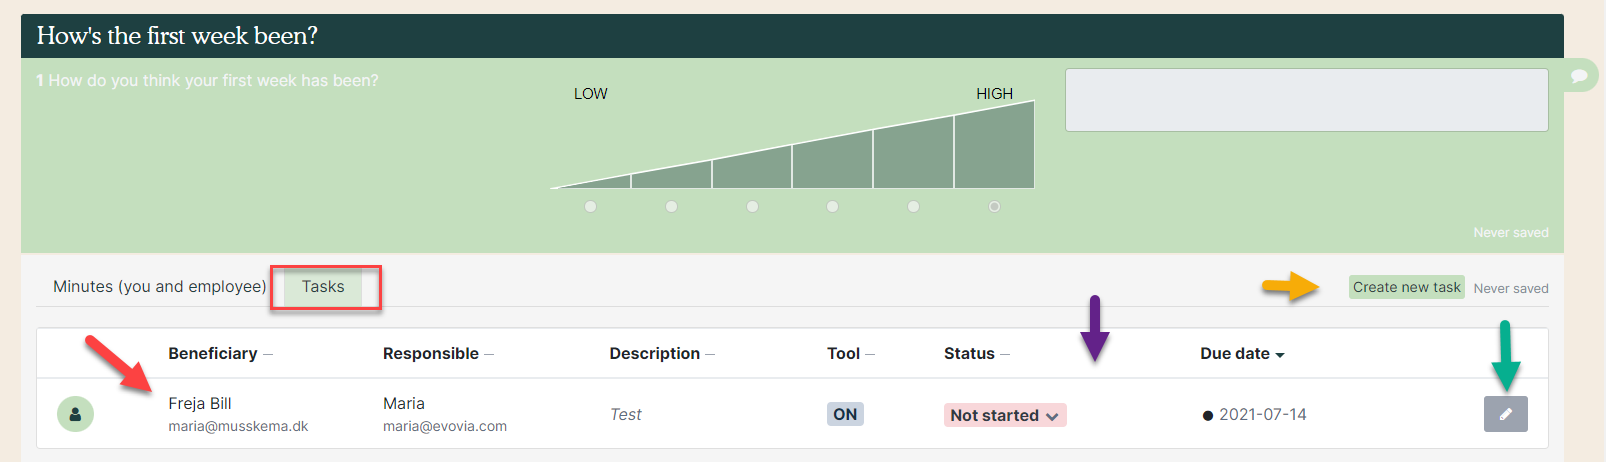
4. Go to the tab ”Tasks” with the following options:
- Red arrow: This is all the tasks created for the employee to this specific question. When you create a new task, they will be visible immediately.
- Yellow arrow: Create a new task.
- Green arrow: Edit tasks. See manual on how to edit tasks.
- Purple arrow: Change status of the task here.
5. If necessary, give the minutes a name (red arrow) and click on 'Close and send the answars'.
