The offboarding tool helps to gather important knowledge and experience from employees who leave the organization, so that their input can be fruitful for collective progress and progress on a number of parameters.
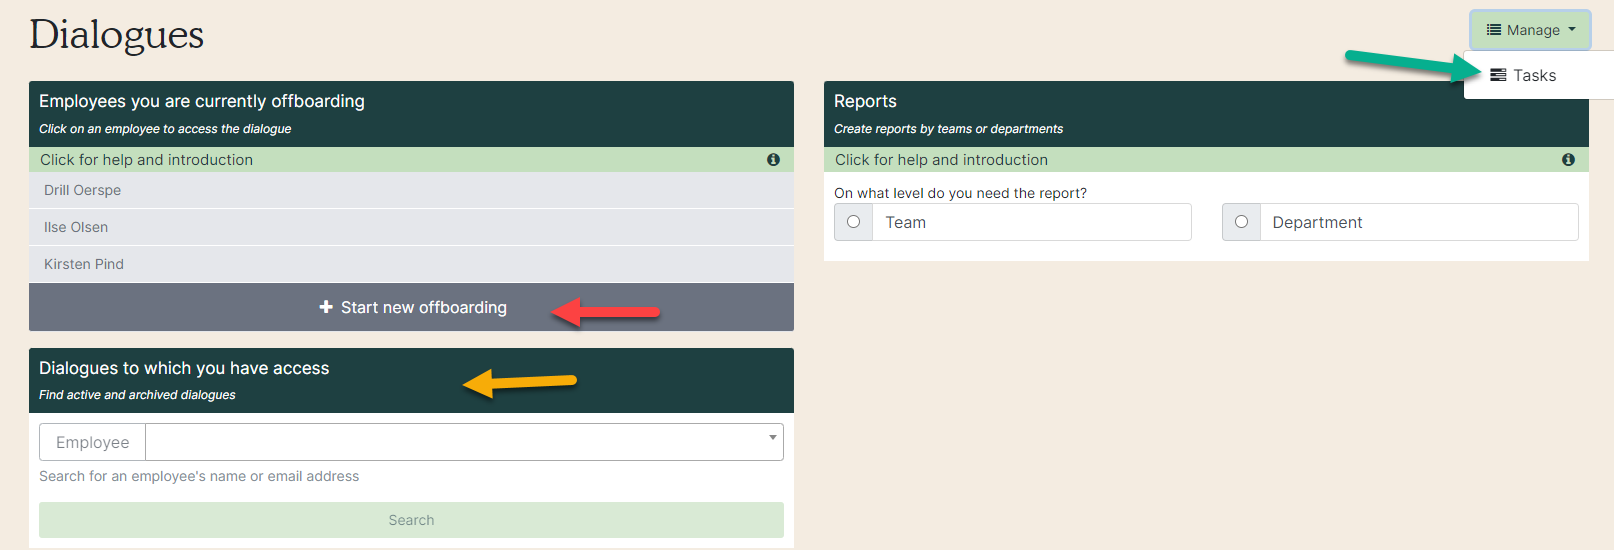
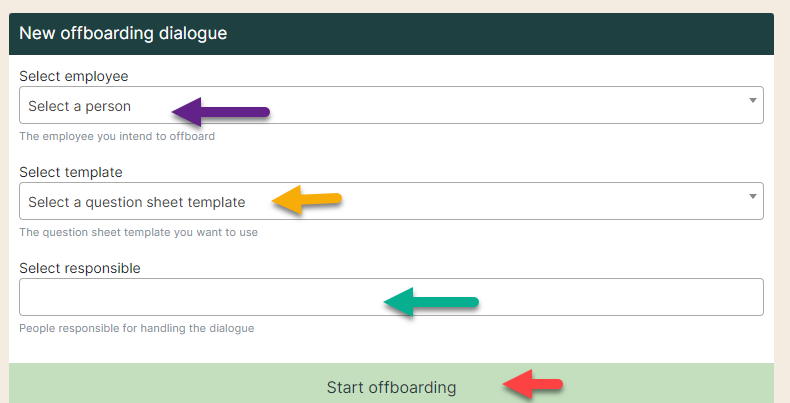
2. If you click on 'New offboarding', a box will appear on the right where you have three options:
1) Select employee (purple arrow).
2) Select template - select the question frame you want to use (yellow arrow).
3) Select responsible - search for the person / persons who will be responsible for the offboarding (green arrow).
Once you have filled in the fields, click on ‘Start offboarding’ (red arrow).
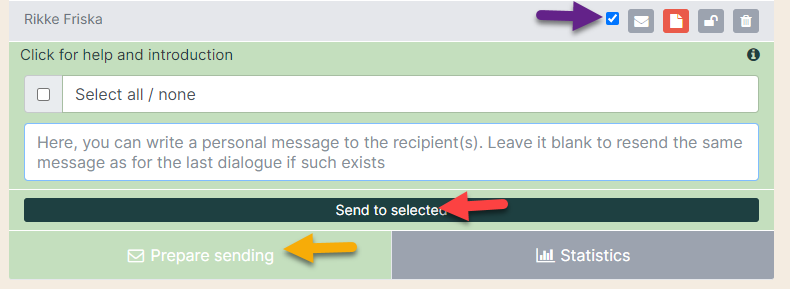
3. Now you can send out a questionnaire to the employee. Click on the gray box 'Send options' (yellow arrow) so that it unfolds and turns green. Then you wing the field next to the employee, write if necessary a personal message in the white box and click on 'Send to selected' (red arrow).
Click ”Edit dialogue” to change the start date for the dialogue round or archive the dialogue.
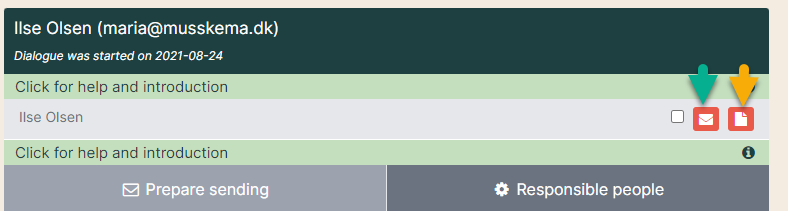
4. When the form is sent to the employee, the envelope color changes from gray to red (green arrow). If the employee is in the process of filling out the form, the envelope will turn yellow, and when completed, it will turn green. The same applies to the minutes sheet (yellow arrow). When it is red, it has not yet been opened. If it is yellow, it has been opened, and when it is green, it is closed. When the minutes are completed, the dialog is moved to the archive.
If the dialogue is to be deleted, contact support at support@evovia.com
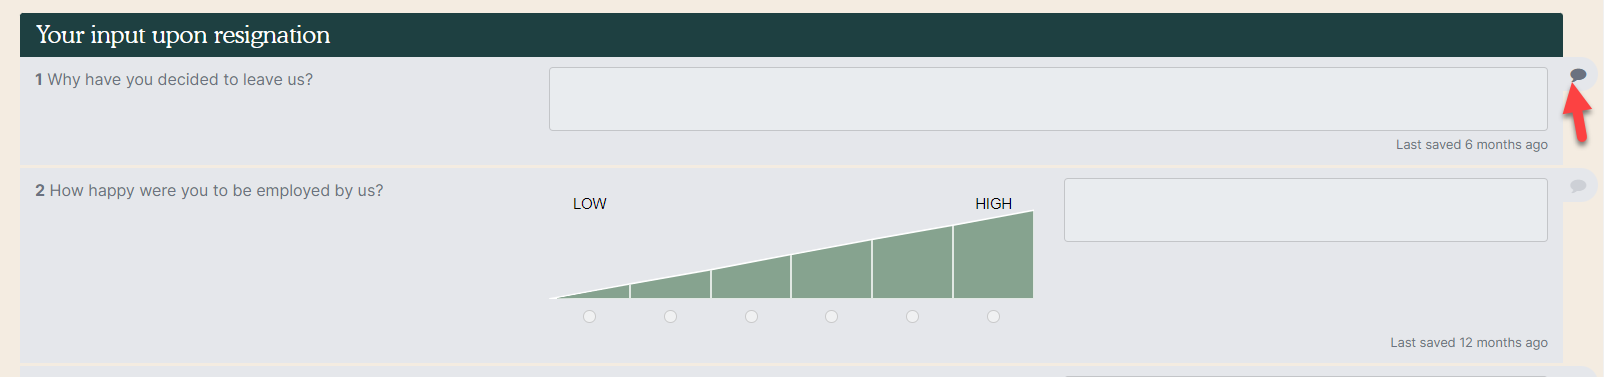
5. We recommend that you talk together based on the employee's answer. Use the minutes sheet to take minutes. Click on the speech bubble next to a question to open it (red arrow).
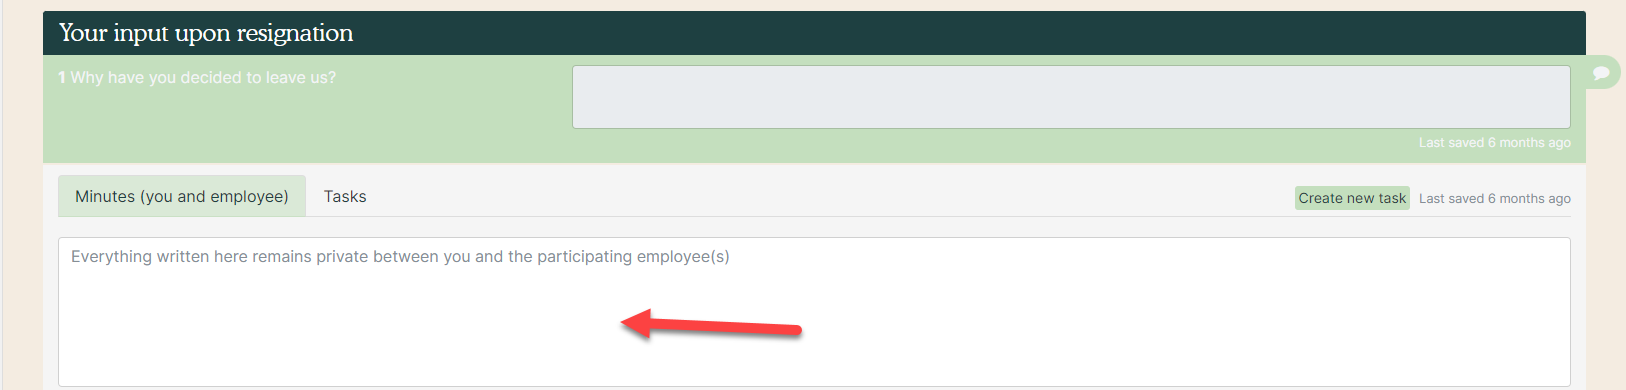
6. For each question you can write minutes in the white box (red arrow). The answers are automatically saved continuously, but are not sent to the employee until you click on 'Finish and send answers' at the bottom of the form.
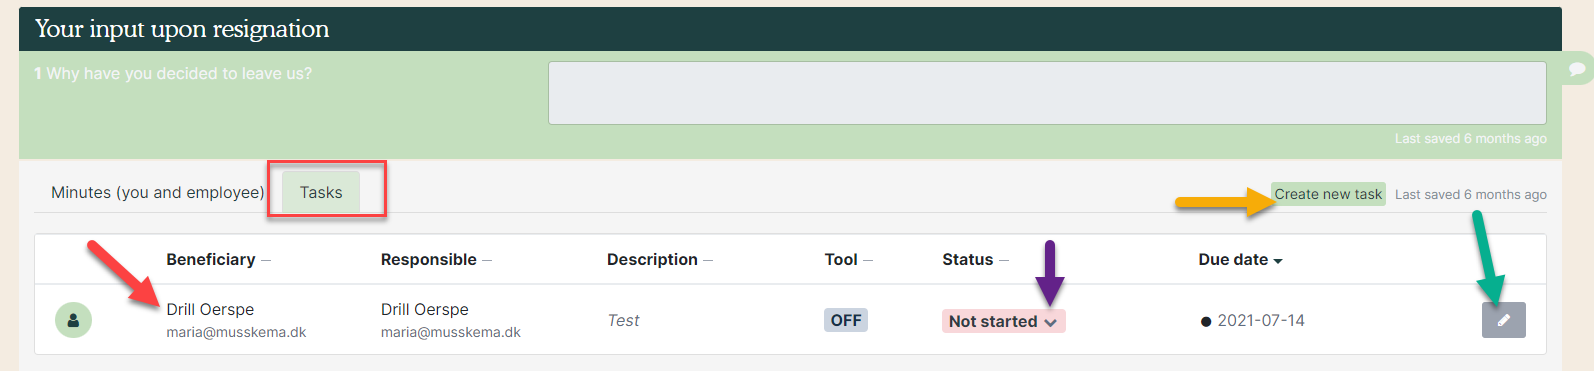
7. Go to ”Task” with the following options:
- Red arrow: This is all the tasks created for the employee to this specific question. When you create a new task, they will be visible immediately.
- Yellow arrow: Create a new task.
- Green arrow: Edit tasks. See manual on how to edit tasks.
- Purple arrow: Change status of the task here.
8. If necessary, give the minutes a name and finish by clicking on 'Finish (red arrow) and send a reply' at the bottom of the form.

Statistics
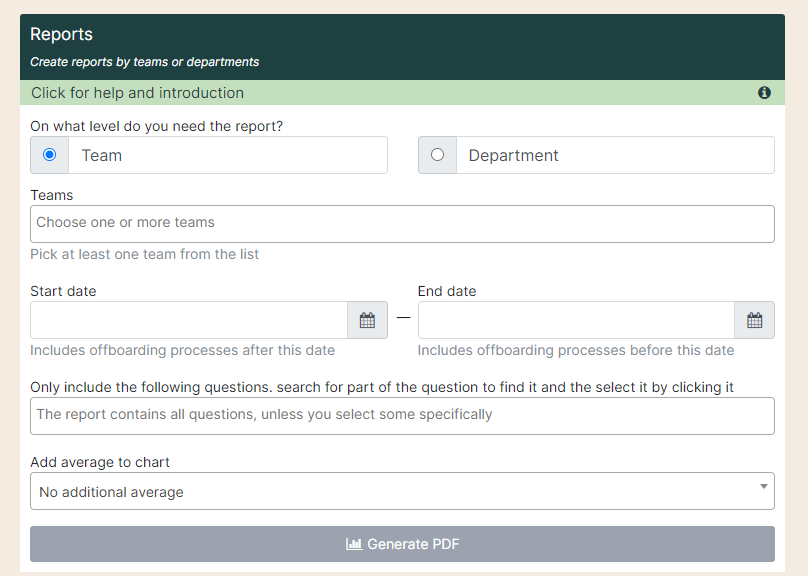
In the offboarding tool, you can get statistics. First, choose whether you want to get statistics for a department or team. Once you have chosen between the two, the box unfolds and you now have several search options:
1) Department / team - select the department or team.
2) Date - select a date range.
3) Questions - choose to search only on the selected questions (if none is selected, all questions are included).
4) Average - choose between nothing, automatic or manual.
When all the fields are filled in, you can generate a PDF.