Ongoing 1:1 can be used for all dialogues between manager and employee
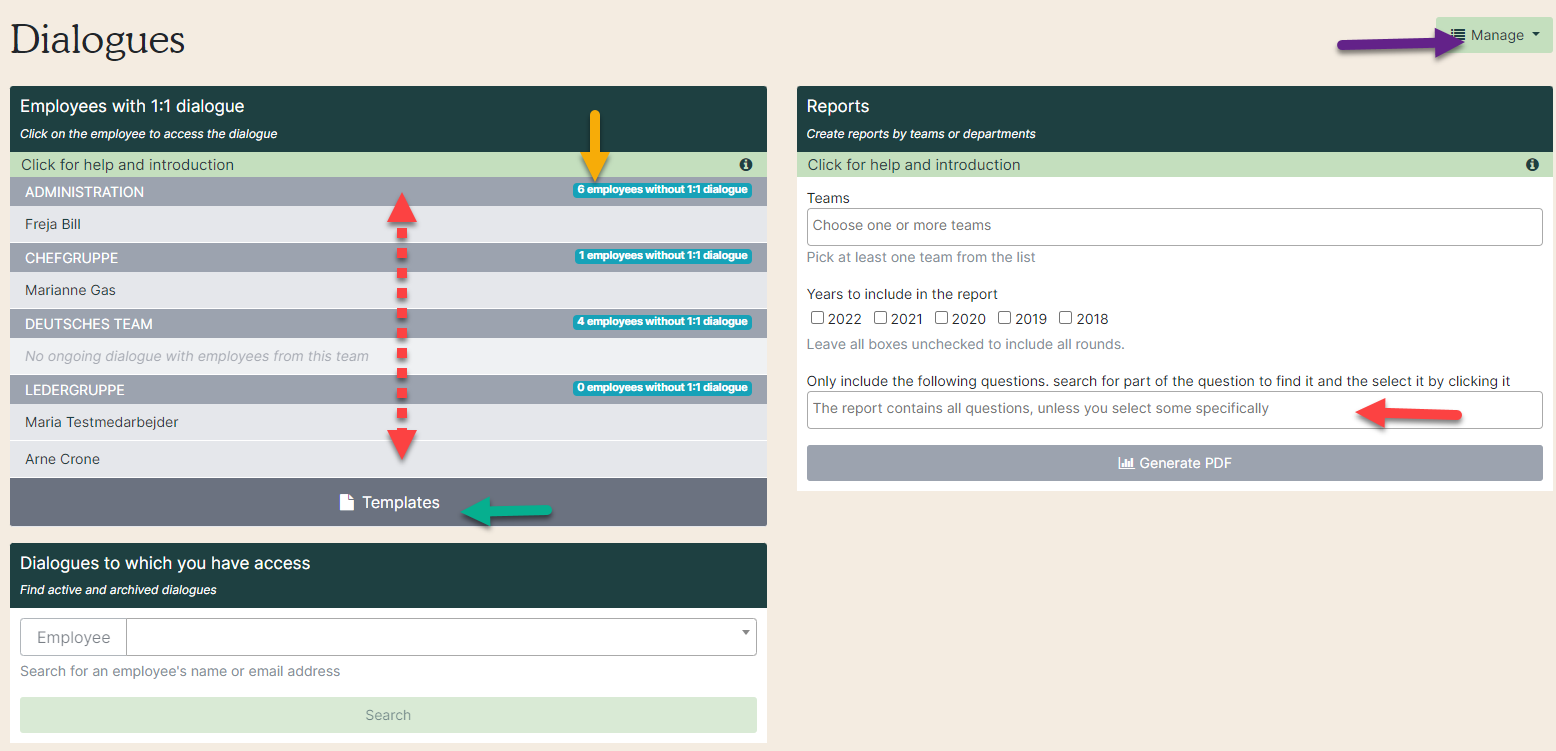
1. Start by going to Ongoing 1: 1. On the front you have the following options:
- Red dotted arrow: Here you can see a list of your teams. Click on the blue lines to see the employees (yellow arrow).
- Green arrow: Via ‘Templates’ (green arrow) you can go directly to your question sheets, where can create and edit if needed.
- Red arrow: Here you can get statistics for the answers in your teams.
- Purple arrow: Via the green box ‘Menu’ you can export data from your dialogues or go directly to the overview of all your tasks.
When an employee is no longer employed, the 1:1 ongoing dialogue is removed from the overview. Previous dialogues can be found in “Dialogue to which you have access”.
Question sheets
1. Click on 'Templates'.
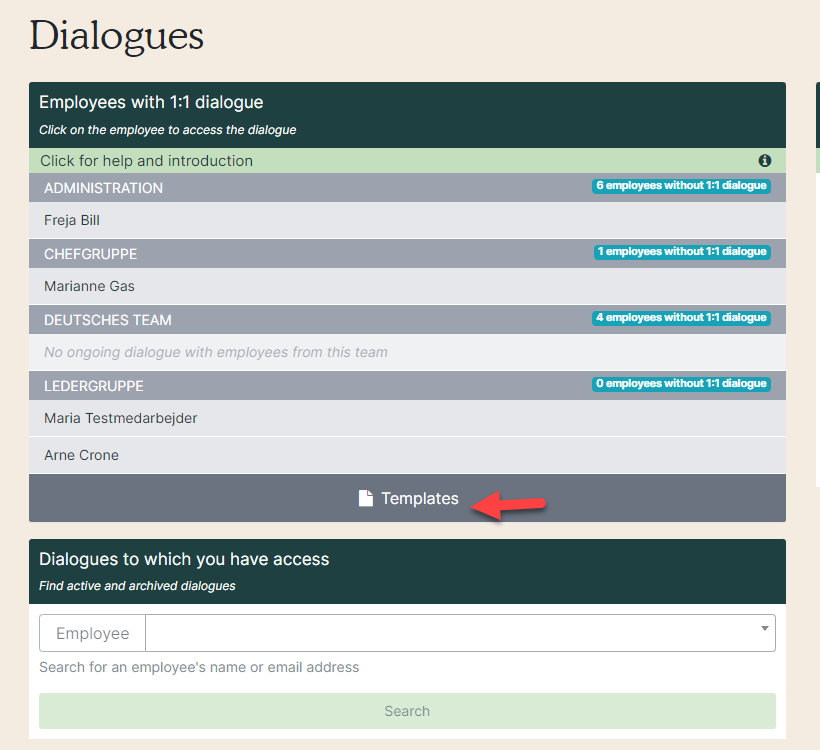
2. Here you have two options:
- Edit an existing question sheet (red arrow)
- Create a new question sheet (yellow arrow)

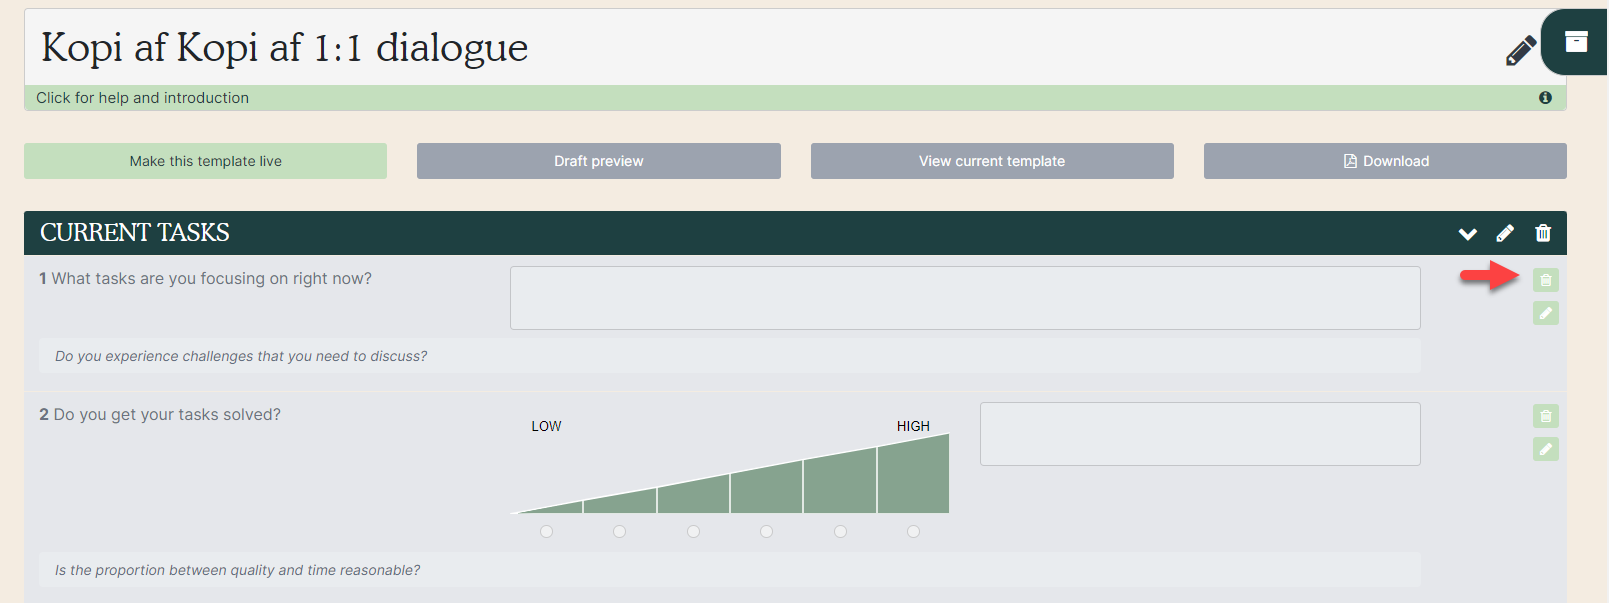
3. Open the questionnaire
When the questionnaire is open, existing questions can be edited or new questions can be created.
If you want to change the wording of an existing question, we recommend that you remove the question from the form (red arrow) and create a new question.
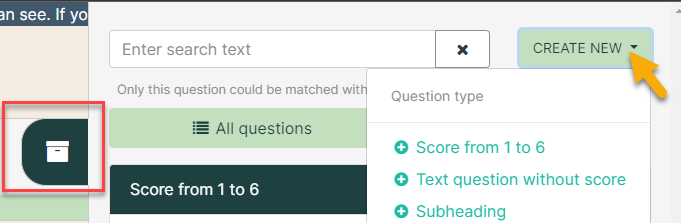
4. Click on the green file box on the right side of the screen to open the question database (red frame). To create a question, click on 'Create New' (yellow arrow) and select the question type.
Write the question and help text and click create. Then you drag the question into the question frame. Move it around by clicking on the question and holding the mouse down.
5. When you have no more corrections, publish the template (red arrow). If you are not ready to publish yet, you can just work on it later. You do not need to do anything active to save the template, as it will update your changes immediately. Just close the form and open it when you want to continue working. The name of the question frame is changed by clicking on the pencil so that the box unfolds (yellow arrow).
If you create a completely new question frame, you add questions by opening the archive box. If you find the ones you need, add them by dragging them into the form. Otherwise, create your new questions by following the same procedure as described above. Remember to publish the template when it is finished.

Start a dialogue with an employee
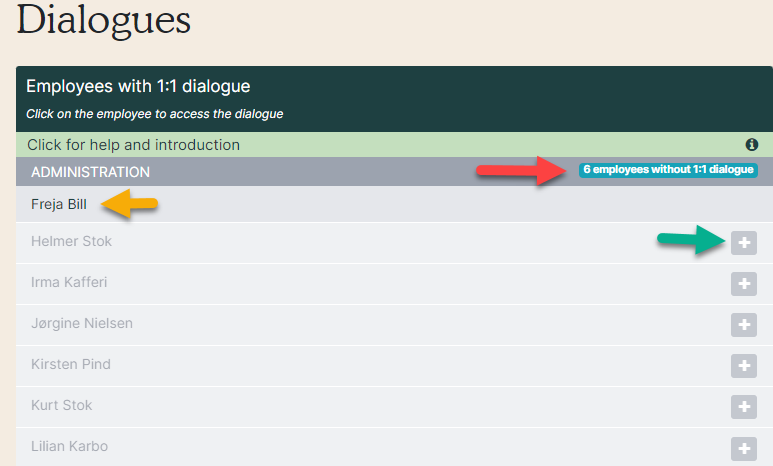
1. In the dialogue overview, you can see the teams and employees with whom you can have an 1:1 dialogue. Click on the blue bar next to the team name to unfold the team (red arrow). If you have already started a dialogue with an employee, their names will be green. Click on the name to go directly to the dialog (yellow arrow). If you have not yet started a dialogue, click on the plus icon next to the employee's name (green arrow).
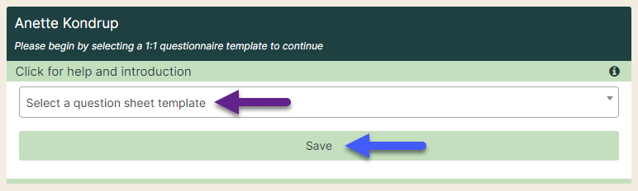
2. Then you have to decide which question sheet you want to use. Click on the question sheet (purple arrow) and save (blue arrow) to start the dialogue.
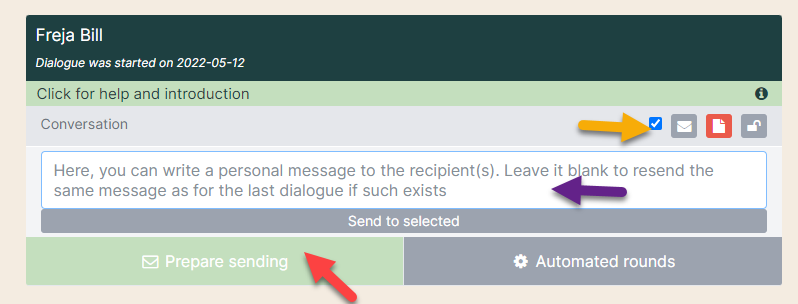
3. The form must then be sent to the employee. Click on 'Send options' so that the box unfolds (red arrow). Tick the small box next to the employee's form (yellow arrow). In the white box you can write a message to the employee. If you do not write anything, the employee will receive the same message as in any previous dialogue round. When everything is ready, click on 'Send to selected' (purple arrow).
The colors on the envelope indicate the status of the employee:
- Grey: Not yet sent to the employee
- Red: Sent to the employee
- Yellow: The employee has started his answer
- Green: The employee has handed in his form
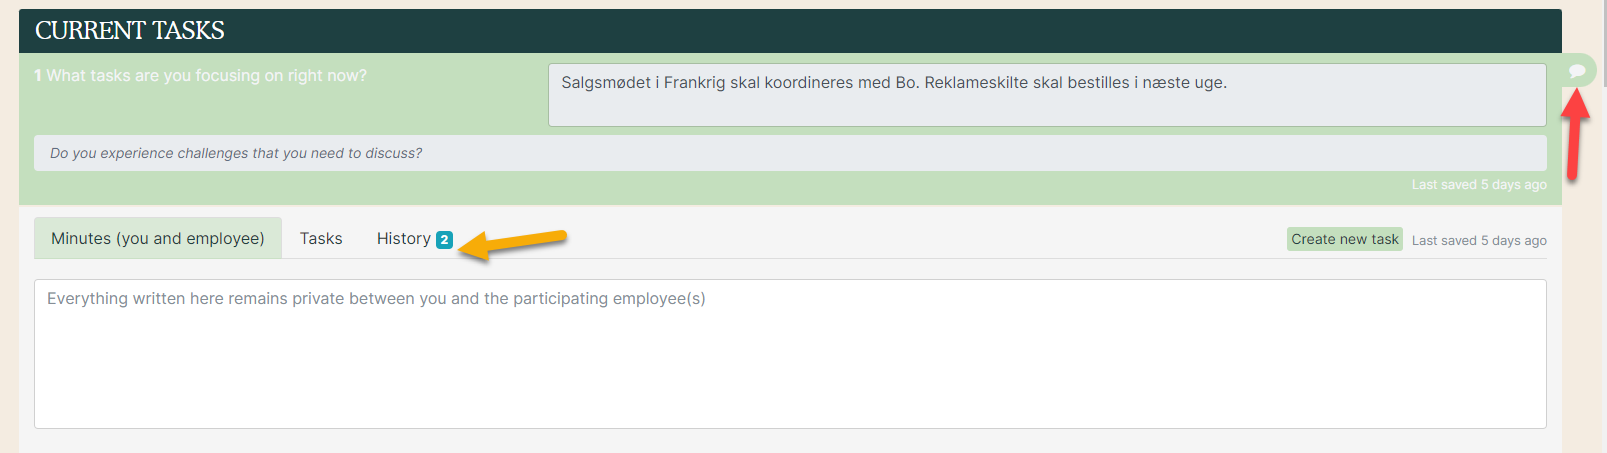
4. Once the employee has handed in his form, the answers are shown in the minute. You can open the minute immediately and write your notes. The questions are opened by clicking on the speech bubble (red arrow). Comments / notes can then be written in the white box. Under the tab ”History” (yellow arrow), minutes from previous dialogues are shown.
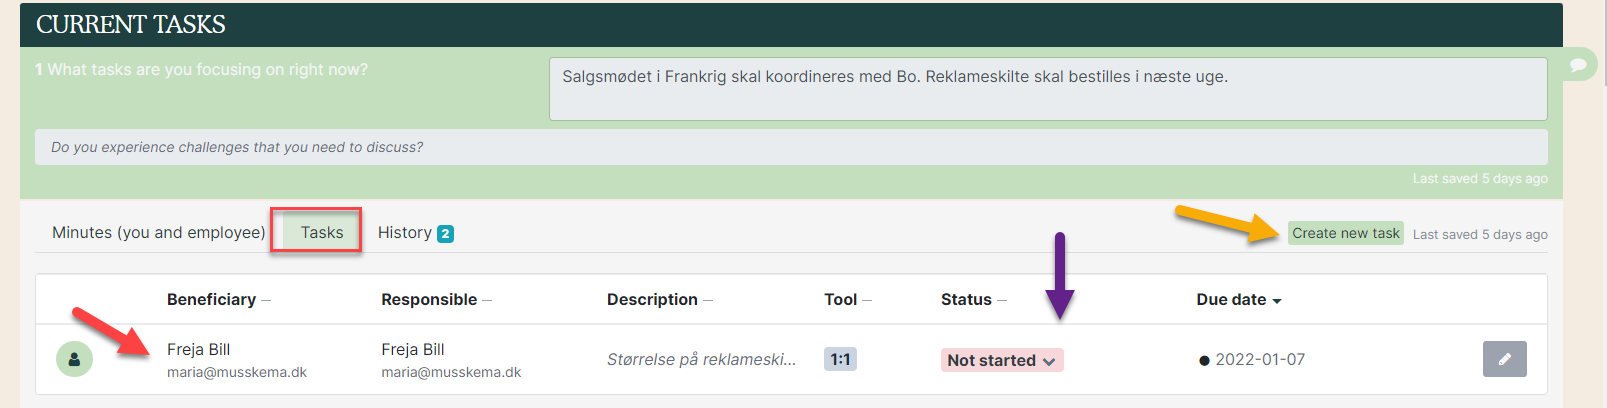
5. Go to the tab ”Tasks” with the following options:
- Red arrow: This is all the tasks created for the employee to this specific question. If there are tasks from e.g. last Ongoing 1:1, they will be visible here. When you create a new task, they will be visible immediately.
- Yellow arrow: Create a new task. By deadline, reminders are sent per. mail to the rsponsible for the task.
- Green arrow: Edit tasks. See manual on how to edit tasks.
- Purple arrow: Change status of the task here.
6. When you are done click on 'Close and send the answars' (red arrow). Then the employee can see the minutes in his inbox. As a manager, you can always open the minutes and make additions - even if it has been completed.

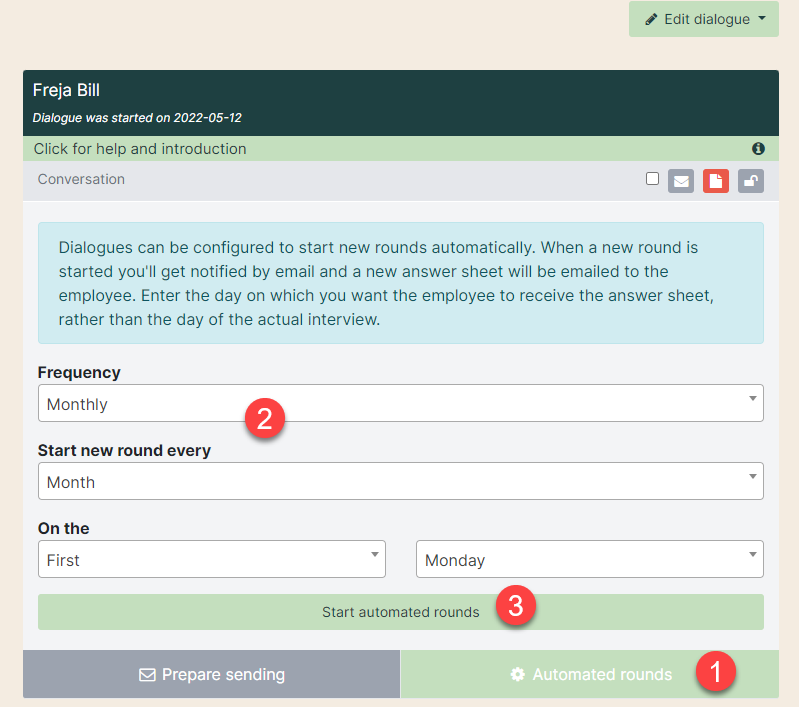
Setting up automatic flows
The dialog must be started before automatic rounds can be set up (follow the procedure described above).
There are now three steps:
1) Click on 'Automatic rounds' so that the box unfolds.
2) Fill in the fields as you wish.
3) Click on 'Start automatic rounds' to start the process.
In the case of change of manager, the automatic flow is cancelled. The new manager can create their own flows for the ongoing 1:1’s.
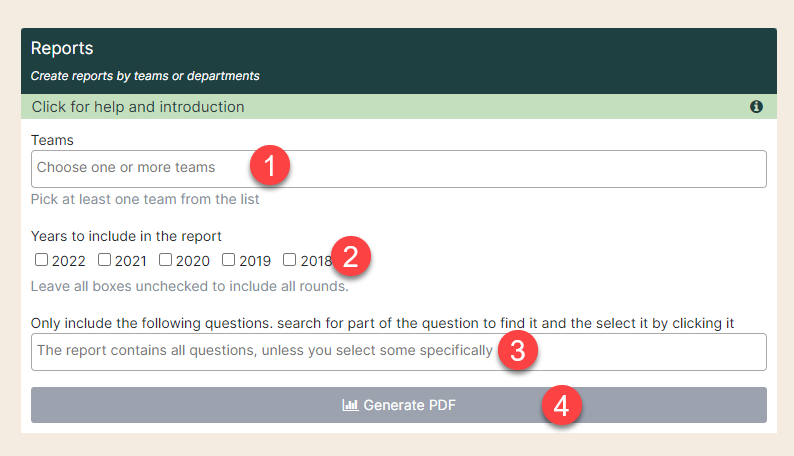
Get statistics
You can get statistics for the dialogues by following these four steps:
1) Select the teams for which you want to get statistics.
2) Select the years you want to include in the statistics.
3) Write if necessary individual questions, to get statistics exclusively for them. If you do not select any, statistics for all questions are automatically deducted.
4) Click on ‘Generate PDF’, after which the report will be downloaded.